
Main Push Workflow
We’ll review the when Main Push Workflow. This is what happens when a push is made to the main branch. Here’s the relevant section.
.circleci/config.yml
parameters:
  manual:
    type: boolean
    default: false

jobs:
  dev_up:
    docker:
      - image: cimg/ruby:3.1.0
    environment: *common_env_vars
    steps:
      - checkout
      - run: .circleci/bin/install
      - run: terraspace up demo -y

workflows:
  dev_up:
    when:
      not: << pipeline.parameters.manual >>
    jobs:
      - dev_up:
          filters:
            branches:
              only: main
Pipeline Parameter
The config defines a manual pipeline parameter. We’re using where.not in the workflows section to tell CircleCI to run the dev_plan when manual=false.
Build Script
The pipeline uses the cimg/ruby:3.1.0 Docker image. This is a Docker image managed by CircleCI.
The first part installs terraform and terraspace with a supporting script that looks something like this:
.circleci/bin/install
#!/bin/bash
# install terraform
git clone https://github.com/tfutils/tfenv.git ~/.tfenv
export PATH="$HOME/.tfenv/bin:$PATH"
tfenv install 1.5.5 # do not use later than 1.5.5
tfenv use 1.5.5

# install terraspace
bundle install
terraspace --version
After the install script, it calls the
terraspace up demo -y
Essentially, terraspace up automatically runs for dev infrastructure for every push to main.
CircleCI Notes
- CircleCI is not currently able to evaluate
config.ymland build different workflows based on whether it’s a PR event or not. Instead, you can possibly check for the environment variableCIRCLE_PULL_REQUESTin your script during the build. - Found that the PR event does not fire when the PR is initially opened. There needs to an additional git push after the PR has been opened for
CIRCLE_PULL_REQUESTto be set. - There’s a discussion and a feature request for the CircleCI team on this topic: Build only pull request to a specific branch.
- This is why this guide chooses to use push workflows with different branches.
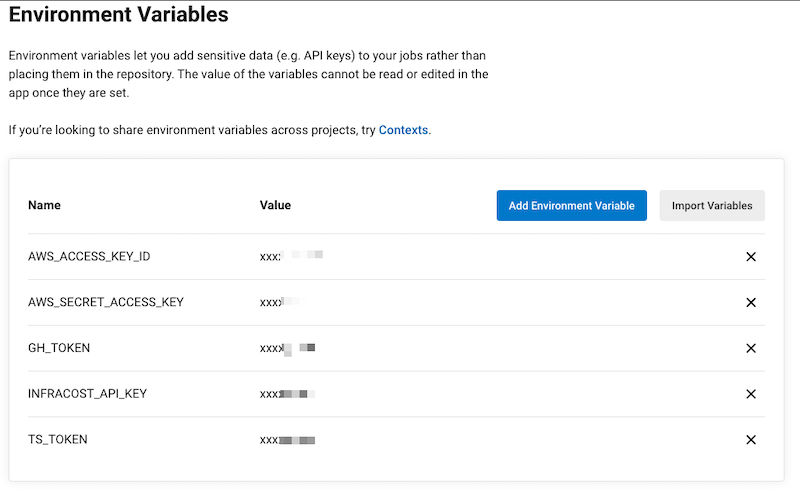
Environment Variables
We should set these environment variables. Note that the AWS variables are required only if you’re using terraspace_plugin_aws.
-
AWS Variables: The workflow is environment configured with
AWS_*variables, so the CI machine has permissions to create resources on AWS. The AWS token need these minimal permissions. -
GH_TOKEN: This allows Terraspace to post PR comments with a summary of the changes and cost estimates. The GitHub Actions token should have necessary permissions. The token should have “repo” permissions so it can create the PR comment.
- Go to Project Settings.
- Go to Environment Variables
- Add the variables, , IE:
AWS_ACCESS_KEY_ID,AWS_SECRET_ACCESS_KEY,AWS_REGION, andTS_TOKEN,GH_TOKEN, etc.
Terraspace Command
At the very end, the terraspace up demo -y command will run to deploy the demo stack. You can customize this command or add additional commands. IE: You probably want to use terraspace all up if you prefer.
Commit and Push
Let’s commit and push the files.
git add .
git commit -m 'add ci'
git push -u origin main
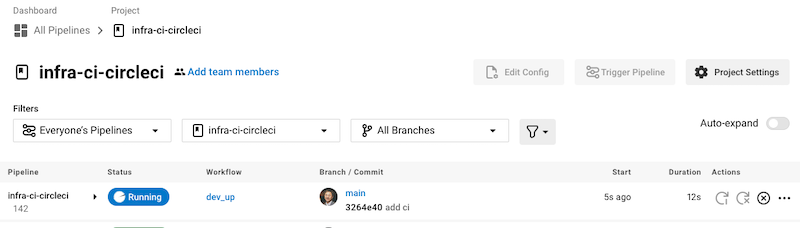
This starts the build process immediately.
Results
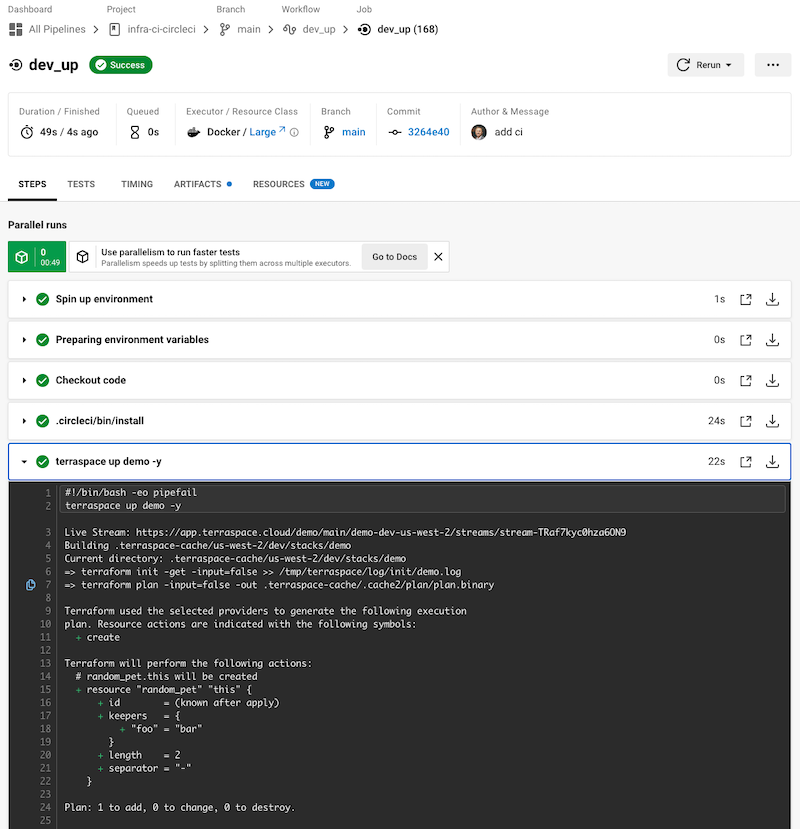
After the job starts, you’ll see something like the following. You may have to refresh to see the job running.
You can see that a resource was created.
Next, we’ll look at the Branch Workflow.


