
Manual Workflow Pipeline
The Manual Workflow is a pipeline designed to be run manually so a human can approve the changes. We’ll use it to apply the changes to production. Let’s take a look at it.
circleci/config.yml
parameters:
  manual:
    type: boolean
    default: false

jobs:
  # Manually triggered for TS_ENV=prod
  prod_plan:
    docker:
      - image: cimg/ruby:3.1.0
    environment: *common_env_vars
    steps:
      - checkout
      - run: .circleci/bin/install
      - run: TS_ENV=prod terraspace plan demo
  prod_up:
    docker:
      - image: cimg/ruby:3.1.0
    environment: *common_env_vars
    steps:
      - checkout
      - run: .circleci/bin/install
      - run: TS_ENV=prod terraspace up demo -y

workflows:
  prod_with_approval:
    when: << pipeline.parameters.manual >>
    jobs:
      - prod_plan
      - hold:
          type: approval
          requires:
            - prod_plan
      - prod_up:
          requires:
            - hold
Terraspace for Prod with Approval
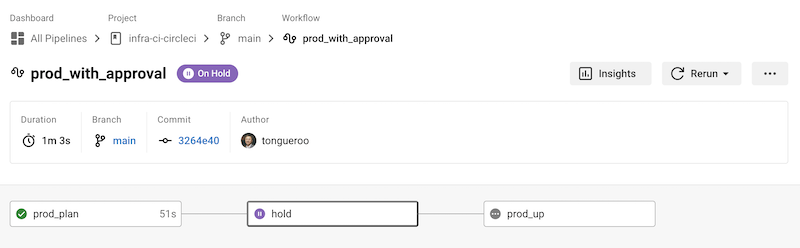
This workflow has 2 main steps and applies for TS_ENV=prod. The first step runs a terraspace plan and last step runs a terraspace up. There is a hold step in between that waits for manual approval.
Pipeline Parameter
Here’s where the manual pipeline parameter is useful. We can set manual=true to run the manual workflow.
Run Pipeline with the Dashboard
Let’s run the pipeline on TS_ENV=prod with the CircleCI Dashboard.
- Go to Projects on the left-side menu.
- Select the project you’re working on.
- Make sure you select the branch main.
- On the upper right hand corner, click on “Trigger Pipeline”
- For parameter, fill in: Parameter Type: string Name: manual Value: true
- Click Trigger Pipeline, this starts the prod pipeline.
Here’s the Trigger Pipeline button:

You’ll need to fill out the Pipeline parameters like so:

The pipeline will start running immediately.

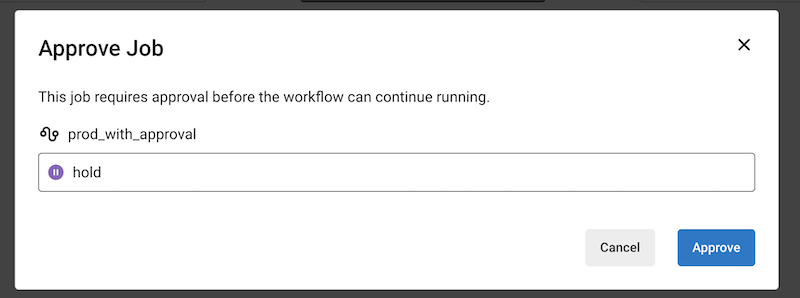
It will pause and wait for approval in the Hold Step. You can review the terraspace plan in the first step of the workflow.
You can approve it by clicking on the hold step.
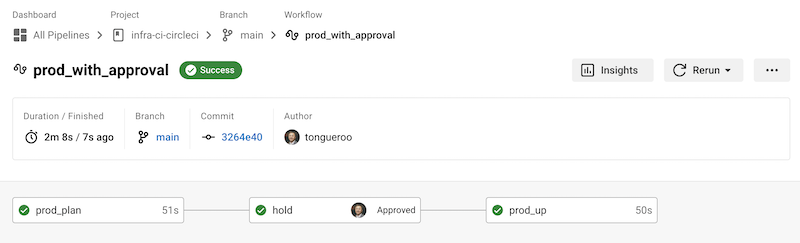
Once the pipeline finishes, you can see all the steps green.
Results
You can view the logs in the final step.
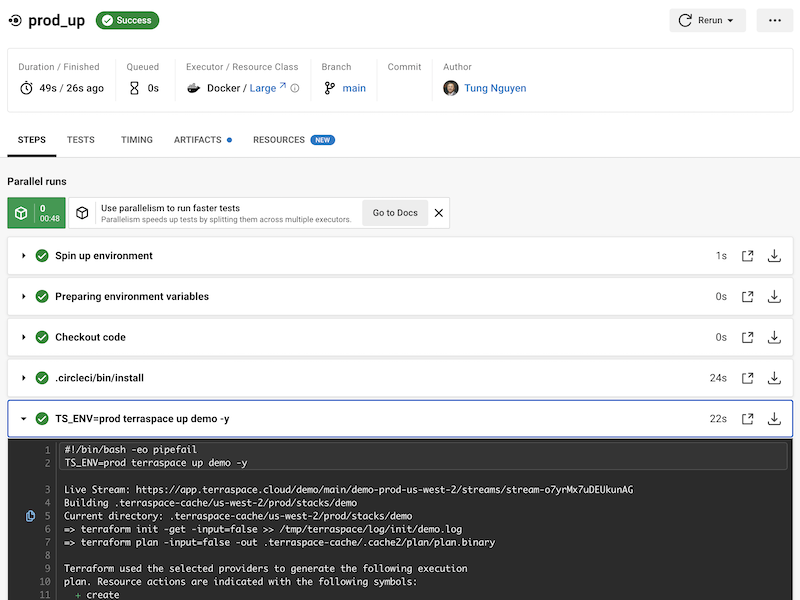
The changes have been applied to production.
Run Pipeline with Curl
If you’re repeatedly testing, running the pipeline via the CircleCI API with curl is useful. Here are some useful commands:
CIRCLE_TOKEN=xxxx # replace with your CircleCI token. It needs to be a *personal* access token, not project token
PROJECT_SLUG=github/ORG/REPO # replace with your ORG and REPO

# sanity check to make sure your token works
curl https://circleci.com/api/v2/me --header "Circle-Token: $CIRCLE_TOKEN"
# another sanity check to get the pipeline
curl --header "Circle-Token: $CIRCLE_TOKEN" \
  --header 'Accept: application/json'    \
  --header 'Content-Type: application/json' \
  https://circleci.com/api/v2/project/$PROJECT_SLUG/pipeline
The command to start the pipeline:
curl --header "Circle-Token: $CIRCLE_TOKEN" \
  --header 'Accept: application/json'    \
  --header 'Content-Type: application/json' \
  --request POST \
  --data '{"branch":"main","parameters":{"manual":true}}' \
  https://circleci.com/api/v2/project/$PROJECT_SLUG/pipeline
Next, we’ll review what we learned.


