
Manual Custom Pipeline
Note: Premium video content requires a subscription.
The Custom Pipeline is a pipeline designed to be run manually so a human can approve the changes. We’ll use it to apply the changes to production. Let’s take a look at it.
bitbucket-pipelines.yml
image: ruby:latest

pipelines:
# ...
  custom:
    terraspace:
      - variables:
          - name: TS_ENV
            default: prod
            allowed-values:
              - dev
              - prod
      - step:
          name: plan
          script:
            - .bitbucket/bin/install
            - .bitbucket/bin/terraspace plan demo
      - step:
          name: up
          trigger: manual
          script:
            - .bitbucket/bin/install
            - .bitbucket/bin/terraspace up demo -y
Run Pipeline
Let’s run the pipeline on TS_ENV=prod.
- Go to Pipelines on the left-side menu.
- Click Run Pipeline on the upper right hand corner
- Select the branch main and select the pipeline custom: terraspace
- Click Run to manually run the pipeline. The pipeline should start shortly.
- Once it gets to the up stage, the Pipeline status will wait for to confirm to run the next step.
- You can click on the Stage and then click Run
Here’s the Run Pipeline button:

Clicking on it will pop up a form.
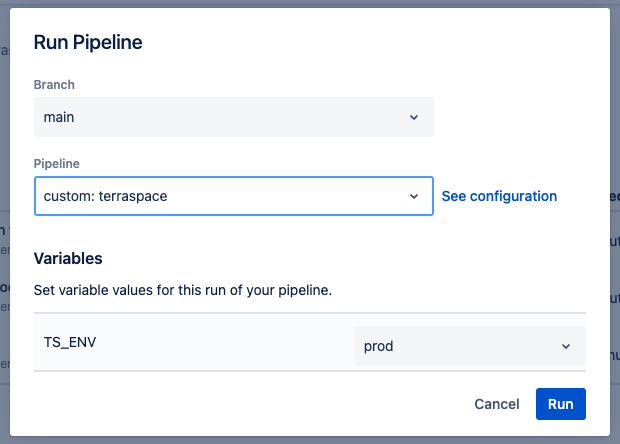
Select the branch main and select the pipeline custom: terraspace and click Run
Once the run is completed, it’ll wait for you.
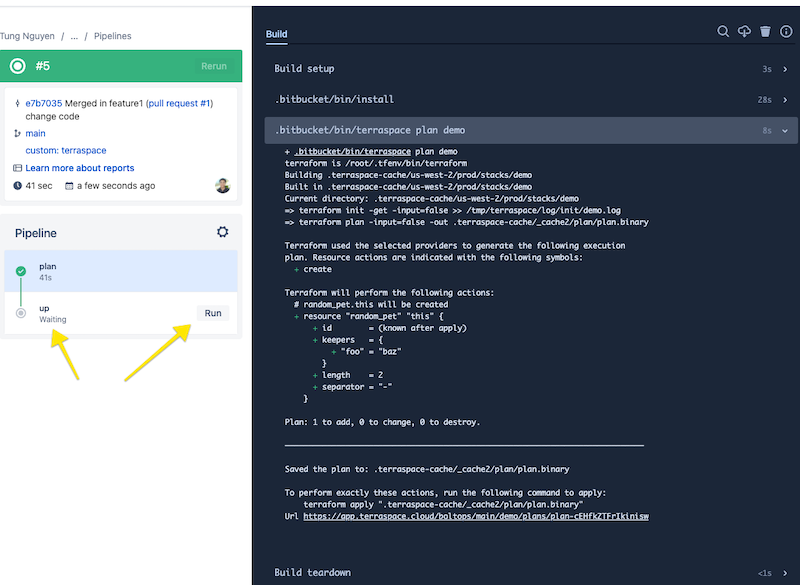
The waiting state is also indicated on the Pipelines List page with a circle icon vs a checkmark.

Results
Click run to approve the changes, and the pipeline runs the terraspace up step.
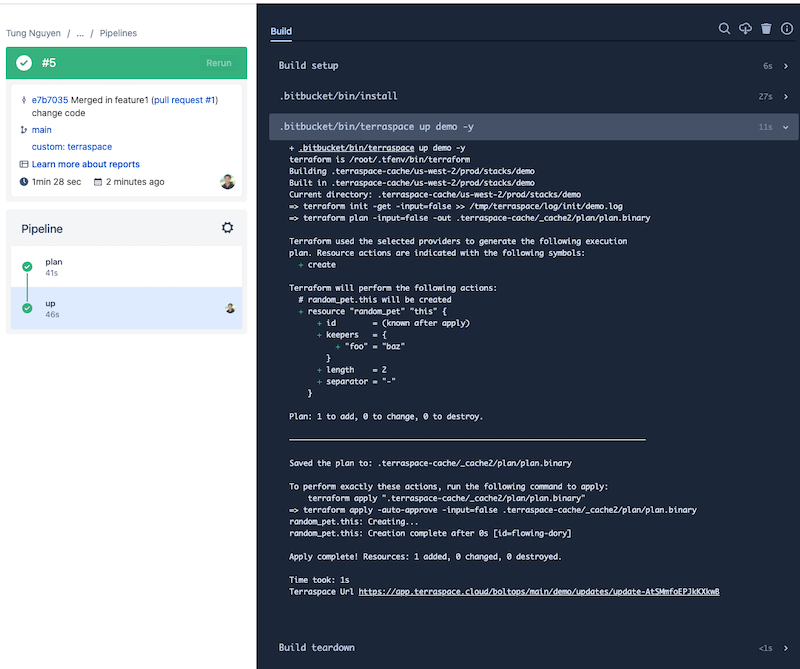
The changes have been applied to production.
Next, we’ll review what we learned.


