
Main Push Pipeline
We’ll review the Main Push Pipeline. This is what happens when a push is made to the main branch. Here’s the relevant YAML section.
.azure/pipelines/dev-up.yml
trigger:
  - main # once merged into main `terraspace up` runs on dev env

pool:
  vmImage: ubuntu-latest

# Note: common-variables group must already exist.
variables:
- group: common-variables

steps:
- task: UseRubyVersion@0
  inputs:
    versionSpec: '>= 3.1'

- script: |
    .azure/bin/install
  displayName: install terraspace

- script: |
    export ARM_CLIENT_ID=$(ARM_CLIENT_ID)
    export ARM_CLIENT_SECRET=$(ARM_CLIENT_SECRET)
    export ARM_SUBSCRIPTION_ID=$(ARM_SUBSCRIPTION_ID)
    export ARM_TENANT_ID=$(ARM_TENANT_ID)
    export TS_TOKEN=$(TS_TOKEN)
    # Uncomment export INFRACOST_API_KEY if using cost estimates
    # export INFRACOST_API_KEY=$(INFRACOST_API_KEY)
    terraspace up demo
  displayName: terraspace up
Pipeline Scripts
The trigger: ["main"] tells Azure to run this pipeline whenever there’s a commit pushed to main. The pool specifies the VM image to use. In this case: Ubuntu.
The steps section contains the meat of the logic. The Azure Pipelines YAML Schema docs are useful.
In the first step, we use a task to install Ruby. Some pre-built tasks are provided by Azure or even 3rd parties.
We then use two script steps to run bash scripts. The first script calls the supporting install script. The script looks something like this. We’re sumarizing it for clarity.
.azure/bin/install
#!/bin/bash

# install terraform
git clone https://github.com/tfutils/tfenv.git ~/.tfenv
export PATH="$HOME/.tfenv/bin:$PATH"
tfenv install 1.5.5 # do not use later than 1.5.5
tfenv use 1.5.5
terraform --version

# install terraspace
bundle install
terraspace --version
The script installs terraspace and dependencies like terraform.
The second script step exports some required env variables and then calls
terraspace up demo -y
Essentially, terraspace up will automatically run for dev infrastructure for every push to main.
Terraspace Command
At the very end, the terraspace up demo -y command will run to deploy the demo stack. You can customize this command or add additional commands. IE: You probably want to use terraspace all up if you prefer.
Commit and Push
Let’s commit and push the files.
git add .
git commit -m 'add ci'
git push -u origin main
Once the YAML files are push, we’ll be able to create the initial pipelines.
Creating the Pipeline with the Azure Portal
To create the pipeline:
- Click on the New Pipeline Button. Note, if you don’t have any pipelines yet, there’ll be another button that says something like “Create First Pipeline” instead.
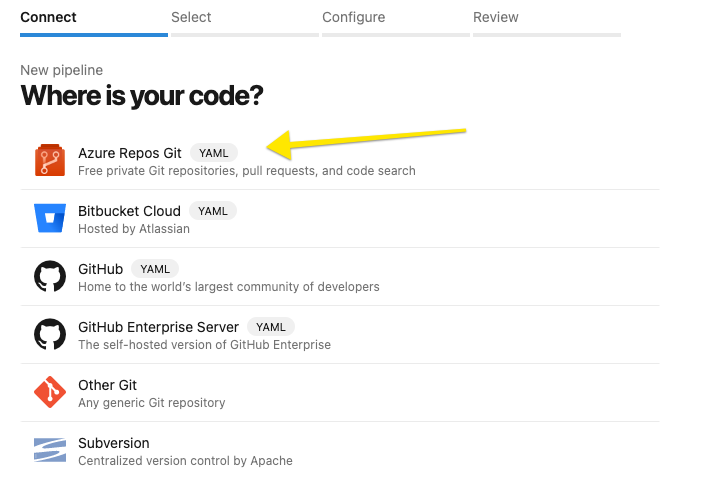
- For “Where is your code”, select Azure Repos Git
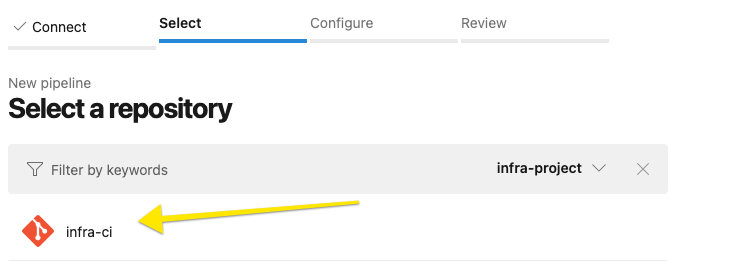
- Choose the Repo with your code. In the example shown below, it’s called infra-ci, yours will be different.
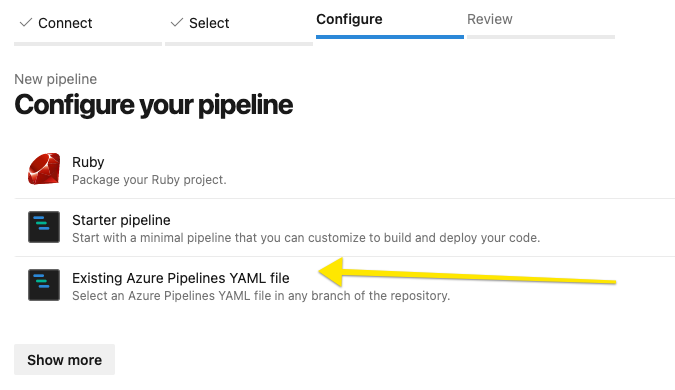
- For “Configure Your Pipeline”, select Existing Azure Pipelines YAML file
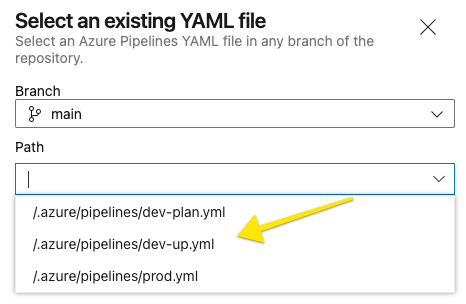
- Select an existing YAML file, choose the
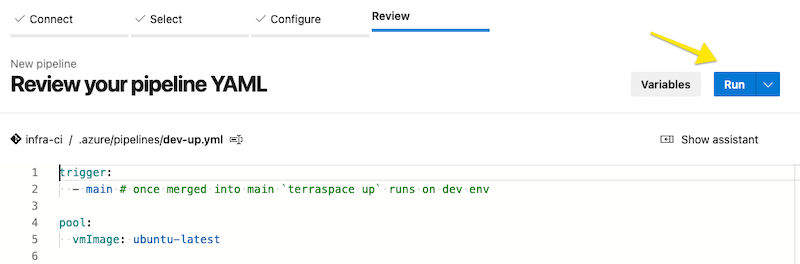
/.azure/pipelines/dev-up.ymlfile - Then click Run
- It is useful to rename the pipeline right away to something better. Rename it to dev-up
- Click on the pipeline to see the logs
Here’s the New Pipeline button.

Where’s your code.
Choose the Repo with your code.
Select Existing Azure Pipelines YAML file.
Select existing YAML file /.azure/pipelines/dev-up.yml.
Click Run
Here’s the rename button.
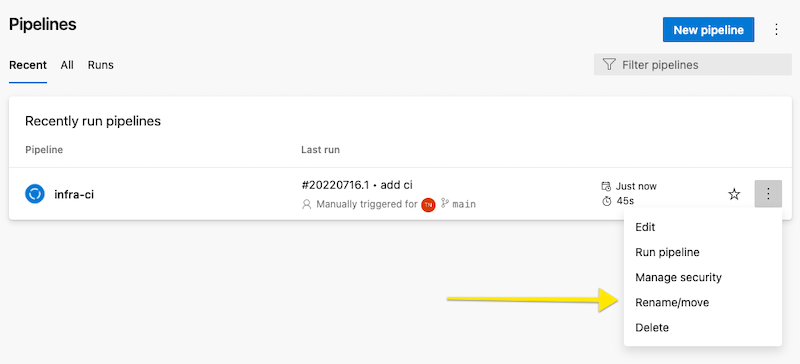
Here’s the rename form.

Here are the logs.
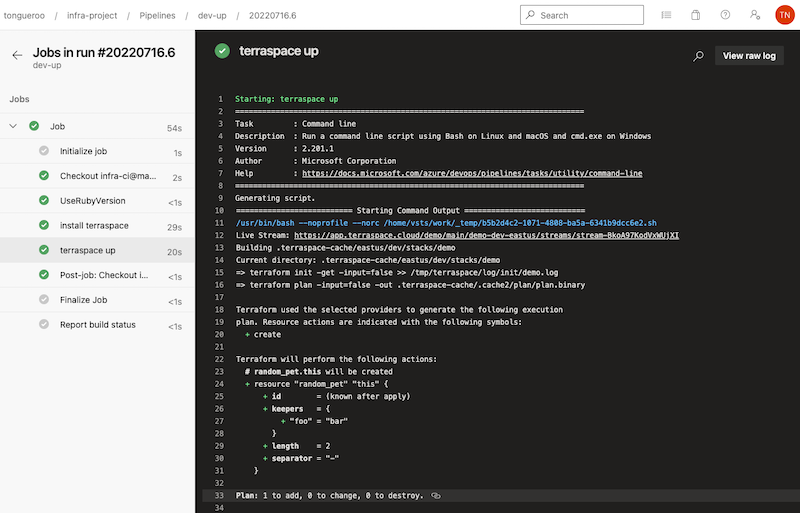
The logs show that a random_pet resource was created. 🐶🎉
Creating the Pipeline with the az cli
Tip: You can also create the pipeline with the az CLI
az devops configure --defaults organization=https://dev.azure.com/ORG/ project=PROJECT
az devops configure --list
az pipelines create --name dev-up --yml-path .azure/pipelines/dev-up.yml # starts pipeline immediately
Next, we’ll look at the Branch Pipeline.


