
Push Workflow
We’ll review the push part of the pipeline. Here’s the relevant part of bitbucket-pipelines.yml that handles it.
bitbucket-pipelines.yml
image: ruby:latest

pipelines:
  branches:
    main:
      - step:
          name: Main Pipeline
          script:
          - .bitbucket/bin/install
          - .bitbucket/bin/terraspace plan demo
# ...
The pipeline uses the ruby:latest Docker image.
Supporting Scripts
A good bit of the logic is in the .bitbucket/bin supporting files. The install file installs terraform and terraspace. It looks something like this:
.bitbucket/bin/install
#!/bin/bash
# install terraform
git clone https://github.com/tfutils/tfenv.git ~/.tfenv
export PATH="$HOME/.tfenv/bin:$PATH"
tfenv install 1.5.5 # do not use later than 1.5.5
tfenv use 1.5.5
terraform --version
# install terraspace
bundle
bundle exec terraspace new shim
export PATH="/usr/local/bin:$PATH"
# install infracost
curl -fsSL https://raw.githubusercontent.com/infracost/infracost/master/scripts/install.sh | sh
The bin/terraspace script is a wrapper that mainly sets up the PATH.
.bitbucket/bin/terraspace
#!/bin/bash
export PATH="$HOME/.tfenv/bin:$PATH"
type terraform
export PATH="/usr/local/bin:$PATH"
exec terraspace "$@"
These supporting scripts are used in other pipelines and keep the code DRYer.
Environment Variables
We should set these environment variables. Note that the AWS variables are required only if you’re using terraspace_plugin_aws.
- AWS Variables: The workflow is environment configured with
AWS_*variables, so the CI machine has permissions to create resources on AWS. The AWS token need these minimal permissions.
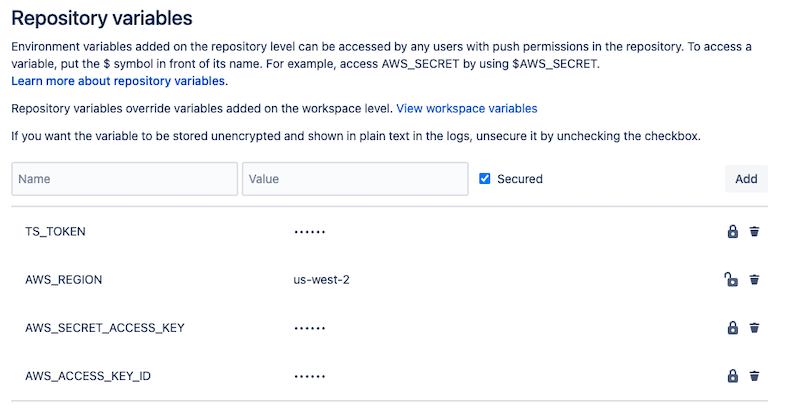
- Go to Repository Settings on the left-hand side.
- Go to Repository variables under the Pipelines section on the left-hand side. Note, you might have to enable Pipelines first.
- Add the variables, , IE:
AWS_ACCESS_KEY_ID,AWS_SECRET_ACCESS_KEY,AWS_REGION, andTS_TOKEN, etc.
Terraspace Command
At the very end, the terraspace up demo -y command will run to deploy the demo stack. You can customize this command or add additional commands. IE: You probably want to use terraspace all up if you prefer.
Commit and Push
Let’s commit and push the files.
git add .
git commit -m 'add ci'
git push -u origin main
This starts the build process immediately.
Results
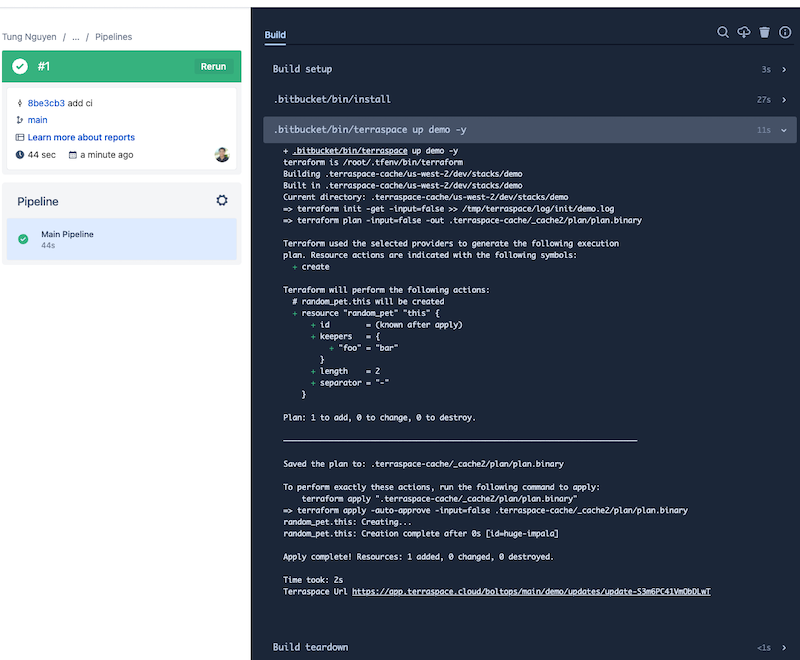
After the job starts, you’ll see something like the following. You may have to refresh to see the job running.

You can see that a resource was created.
Next, we’ll look at the Pull Request Pipeline.


